how to grow turmeric in a pot – [Beginners Guide]

Introduction
Growing your own food is a great way to save money and have fresh ingredients on hand all year round. But you don’t have to have a large garden to grow your own herbs and spices. With a few pots and some basic care, you can grow turmeric right in your own kitchen or on a windowsill.
Turmeric is a popular spice with a warm, earthy flavor and a long history of use in cooking and medicine. This plant is not only delicious, but it’s also incredibly easy to grow. In fact, you can grow turmeric in pots at home with just a few simple steps.
Why Grow Turmeric in a Pot?
- Easy and convenient – you can grow turmeric right in your own kitchen or on a windowsill
- Cost-effective – growing your own turmeric can save you money in the long run
- Guaranteed freshness – you’ll always have fresh turmeric on hand when you need it
- Space-saving – pots take up less space than a full-scale garden, so even apartment dwellers can grow their own turmeric
In this guide, I’ll take you step by step through the process of growing turmeric in a pot, from selecting the right pot and soil, to caring for your plant, to harvesting and storing your turmeric. So let’s get started and learn how to grow this amazing spice in your own home!
Pot or container selection
Type of Pot for Growing Turmeric
Turmeric is a rhizome plant, which means it grows underground stems (rhizomes) that produce roots and shoots. To grow turmeric in a pot, you will need a pot that is deep enough to accommodate the rhizomes and provide adequate root space for the plant to grow.
Size and Capacity of the Pot
A pot with a capacity of at least 10-12 inches (25-30 cm) in diameter and 12-15 inches (30-38 cm) in depth is recommended for growing turmeric. This will provide enough space for the plant to grow and develop properly.
Pot Construction
- Drainage holes – Make sure the pot has drainage holes in the bottom to allow excess water to drain out and prevent the plant from sitting in water, which can cause root rot.
- Materials – A pot made of terra cotta or a similar porous material is ideal for growing turmeric as it allows air to circulate and helps regulate soil moisture levels. Avoid plastic pots, which can retain too much moisture and encourage root rot.
In summary, a pot with a capacity of 10-12 inches in diameter and 12-15 inches in depth with drainage holes and made of porous material is the best choice for growing turmeric in a pot at home.
Make suitable soil mix
Soil type and mixture for growing turmeric:
Turmeric plants grow best in well-drained soil that is rich in organic matter. A good soil mix for turmeric consists of a combination of loamy soil, sand, and organic matter such as compost or well-rotted manure. The ideal soil pH for turmeric is between 6.0 and 7.0, which is slightly acidic to neutral.
Importance of correct soil composition:
Having the correct soil composition is essential for optimal growth of turmeric plants. The soil must be able to retain enough moisture to support the plants, but must also have good drainage so that the roots are not waterlogged. Additionally, the soil must contain sufficient nutrients for the plants to grow and produce healthy foliage and rhizomes. Organic matter provides the necessary nutrients, as well as helps improve soil structure and drainage.
In conclusion, a mixture of loamy soil, sand, and organic matter is the best soil mix for growing turmeric at home. A soil pH between 6.0 and 7.0 and good nutrient content is also important for optimal growth and yield of turmeric plants.
How to plant the turmeric?
Step 1: Choose the Right Pot
Select a pot that is at least 10-12 inches deep and has good drainage holes at the bottom. You can use plastic, ceramic, or terra cotta pots for planting turmeric.
Step 2: Prepare the Soil
Fill the pot with a well-draining potting mix of equal parts of garden soil, compost, and sand. You can also use an all-purpose potting mix.
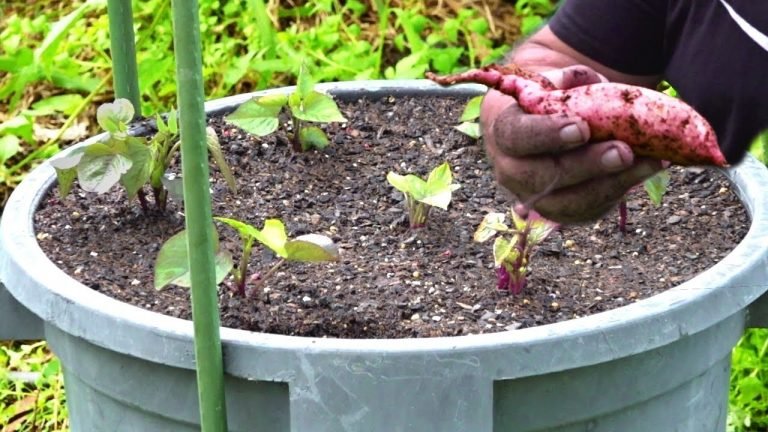
Step 3: Plant the Rhizomes
Turmeric is grown from rhizomes (root cuttings), not seeds. Take rhizomes from a mature turmeric plant or buy them from a gardening supply store. Plant each rhizome about 2-3 inches deep and 4-5 inches apart in the pot.
Step 4: Water and Sunlight
Water the planted rhizomes well and place the pot in a warm and bright location with indirect sunlight. Turmeric needs about 6-8 hours of bright, indirect light per day.
Step 5: Maintenance
Keep the soil consistently moist but not waterlogged. Fertilize the turmeric every 2-3 weeks with an all-purpose fertilizer. Harvest the turmeric after 8-10 months, when the leaves have yellowed and died back.
Note:
Turmeric is a slow-growing plant and may take several months to sprout. Be patient and keep the soil moist and well-drained, and your turmeric should start growing successfully.
Output:
Step 1: Choose the Right Pot
Select a pot that is at least 10-12 inches deep and has good drainage holes at the bottom. You can use plastic, ceramic, or terra cotta pots for planting turmeric.
Step 2: Prepare the Soil
Fill the pot with a well-draining potting mix of equal parts of garden soil, compost, and sand. You can also use an all-purpose potting mix.
Step 3: Plant the Rhizomes
Turmeric is grown from rhizomes (root cuttings), not seeds. Take rhizomes from a mature turmeric plant or buy them from a gardening supply store. Plant each rhizome about 2-3 inches deep and 4-5 inches apart in the pot.
Step 4: Water and Sunlight
Water the planted rhizomes well and place the pot in a warm and bright location with indirect sunlight. Turmeric needs about 6-8 hours of bright, indirect light per day.
Step 5: Maintenance
Keep the soil consistently moist but not waterlogged. Fertilize the turmeric every 2-3 weeks with an all-purpose fertilizer. Harvest the turmeric after 8-10 months, when the leaves have yellowed and died back.
How to care for turmeric?
Watering Requirements
Turmeric requires moist soil, but not waterlogged. Water the pot thoroughly once or twice a week, depending on the temperature and humidity. In hot and dry weather, you may need to water more frequently. On the other hand, if the soil stays consistently moist, reduce watering frequency.
Fertilizer Requirement
Turmeric benefits from regular fertilization. Apply an all-purpose fertilizer every 2-3 weeks, according to the package instructions. Alternatively, you can use compost tea or fish emulsion to fertilize your turmeric plant.
Sunlight Needs
Turmeric needs about 6-8 hours of bright, indirect light per day. Place the pot in a warm and bright location, but away from direct sun, which can scorch the leaves. North-facing windows or shaded balconies are ideal for growing turmeric indoors.
Pruning & Training
Turmeric does not need pruning, but you can remove yellowed or dead leaves to keep the plant looking tidy. The plant will naturally grow upward, but you can train it to grow in a certain direction by positioning it towards the light source.
Additional Care
Soil Moisture: Make sure the soil stays consistently moist but not waterlogged. This can be achieved by watering regularly and making sure the pot has good drainage holes at the bottom.
Temperature: Turmeric prefers warm and consistent temperatures between 65-85°F (18-30°C). Avoid exposing the plant to sudden temperature changes or cold drafts.
Pests & Diseases: Turmeric is generally a low-maintenance plant, but it can be susceptible to root rot and pests such as spider mites or scale insects. Check the plant regularly for signs of pest infestations or diseased leaves and treat promptly.
Output:
Watering Requirements
Turmeric requires moist soil, but not waterlogged. Water the pot thoroughly once or twice a week, depending on the temperature and humidity. In hot and dry weather, you may need to water more frequently. On the other hand, if the soil stays consistently moist, reduce watering frequency.
Fertilizer Requirement
Turmeric benefits from regular fertilization. Apply an all-purpose fertilizer every 2-3 weeks, according to the package instructions. Alternatively, you can use compost tea or fish emulsion to fertilize your turmeric plant.
Sunlight Needs
Turmeric needs about 6-8 hours of bright, indirect light per day. Place the pot in a warm and bright location, but away from direct sun, which can scorch the leaves. North-facing windows or shaded balconies are ideal for growing turmeric indoors.
Pruning & Training
Turmeric does not need pruning, but you can remove yellowed or dead leaves to keep the plant looking tidy. The plant will naturally grow upward, but you can train it to grow in a certain direction by positioning it
Common problems
Pests & Diseases
Turmeric grown in pots can be susceptible to pests such as spider mites or scale insects, which can infest the leaves and sap the plant’s vitality. Regularly checking the plant for signs of pest infestation and treating promptly can help prevent pest damage. Additionally, turmeric plants can also be affected by fungal diseases such as root rot, caused by overly moist soil, which can cause yellowing and wilting of the leaves.
Poor Production
Turmeric grown in pots may produce smaller rhizomes compared to those grown in the ground. However, the quality of the rhizomes should be the same. To promote good production, make sure the plant receives adequate light, water, and nutrition. Overcrowding the pot or exposing the plant to cold drafts can also reduce production.
Other Issues
Leaf yellowing: Yellowing of the leaves can be a sign of over-watering, underwatering, or exposure to direct sun. Make sure the soil is moist but not waterlogged, and adjust watering frequency accordingly. Also, place the pot in a location with bright, indirect light.
Stunted growth: Stunted growth can be caused by poor light, nutrient deficiencies, or exposure to cold temperatures. Provide the plant with bright, indirect light, and regular fertilization, and avoid exposing the plant to cold drafts.
Output:
Pests & Diseases
Turmeric grown in pots can be susceptible to pests such as spider mites or scale insects, which can infest the leaves and sap the plant’s vitality. Regularly checking the plant for signs of pest infestation and treating promptly can help prevent pest damage. Additionally, turmeric plants can also be affected by fungal diseases such as root rot, caused by overly moist soil, which can cause yellowing and wilting of the leaves.
Poor Production
Turmeric grown in pots may produce smaller rhizomes compared to those grown in the ground. However, the quality of the rhizomes should be the same. To promote good production, make sure the plant receives adequate light, water, and nutrition. Overcrowding the pot or exposing the plant to cold drafts can also reduce production.
Other Issues
Leaf yellowing: Yellowing of the leaves can be a sign of over-watering, underwatering, or exposure to direct sun. Make sure the soil is moist but not waterlogged, and adjust watering frequency accordingly. Also, place the pot in a location with bright, indirect light.
Stunted growth: Stunted growth can be caused by poor light, nutrient deficiencies, or exposure to cold temperatures. Provide the plant with bright, indirect light, and regular fertilization, and avoid exposing the plant to cold drafts.
Harvesting & storing homegrown turmeric
Harvesting Time
Turmeric is ready for harvest after 8-10 months of growth, when the leaves begin to yellow and die back. This usually occurs in late fall to early winter.
Harvesting Process
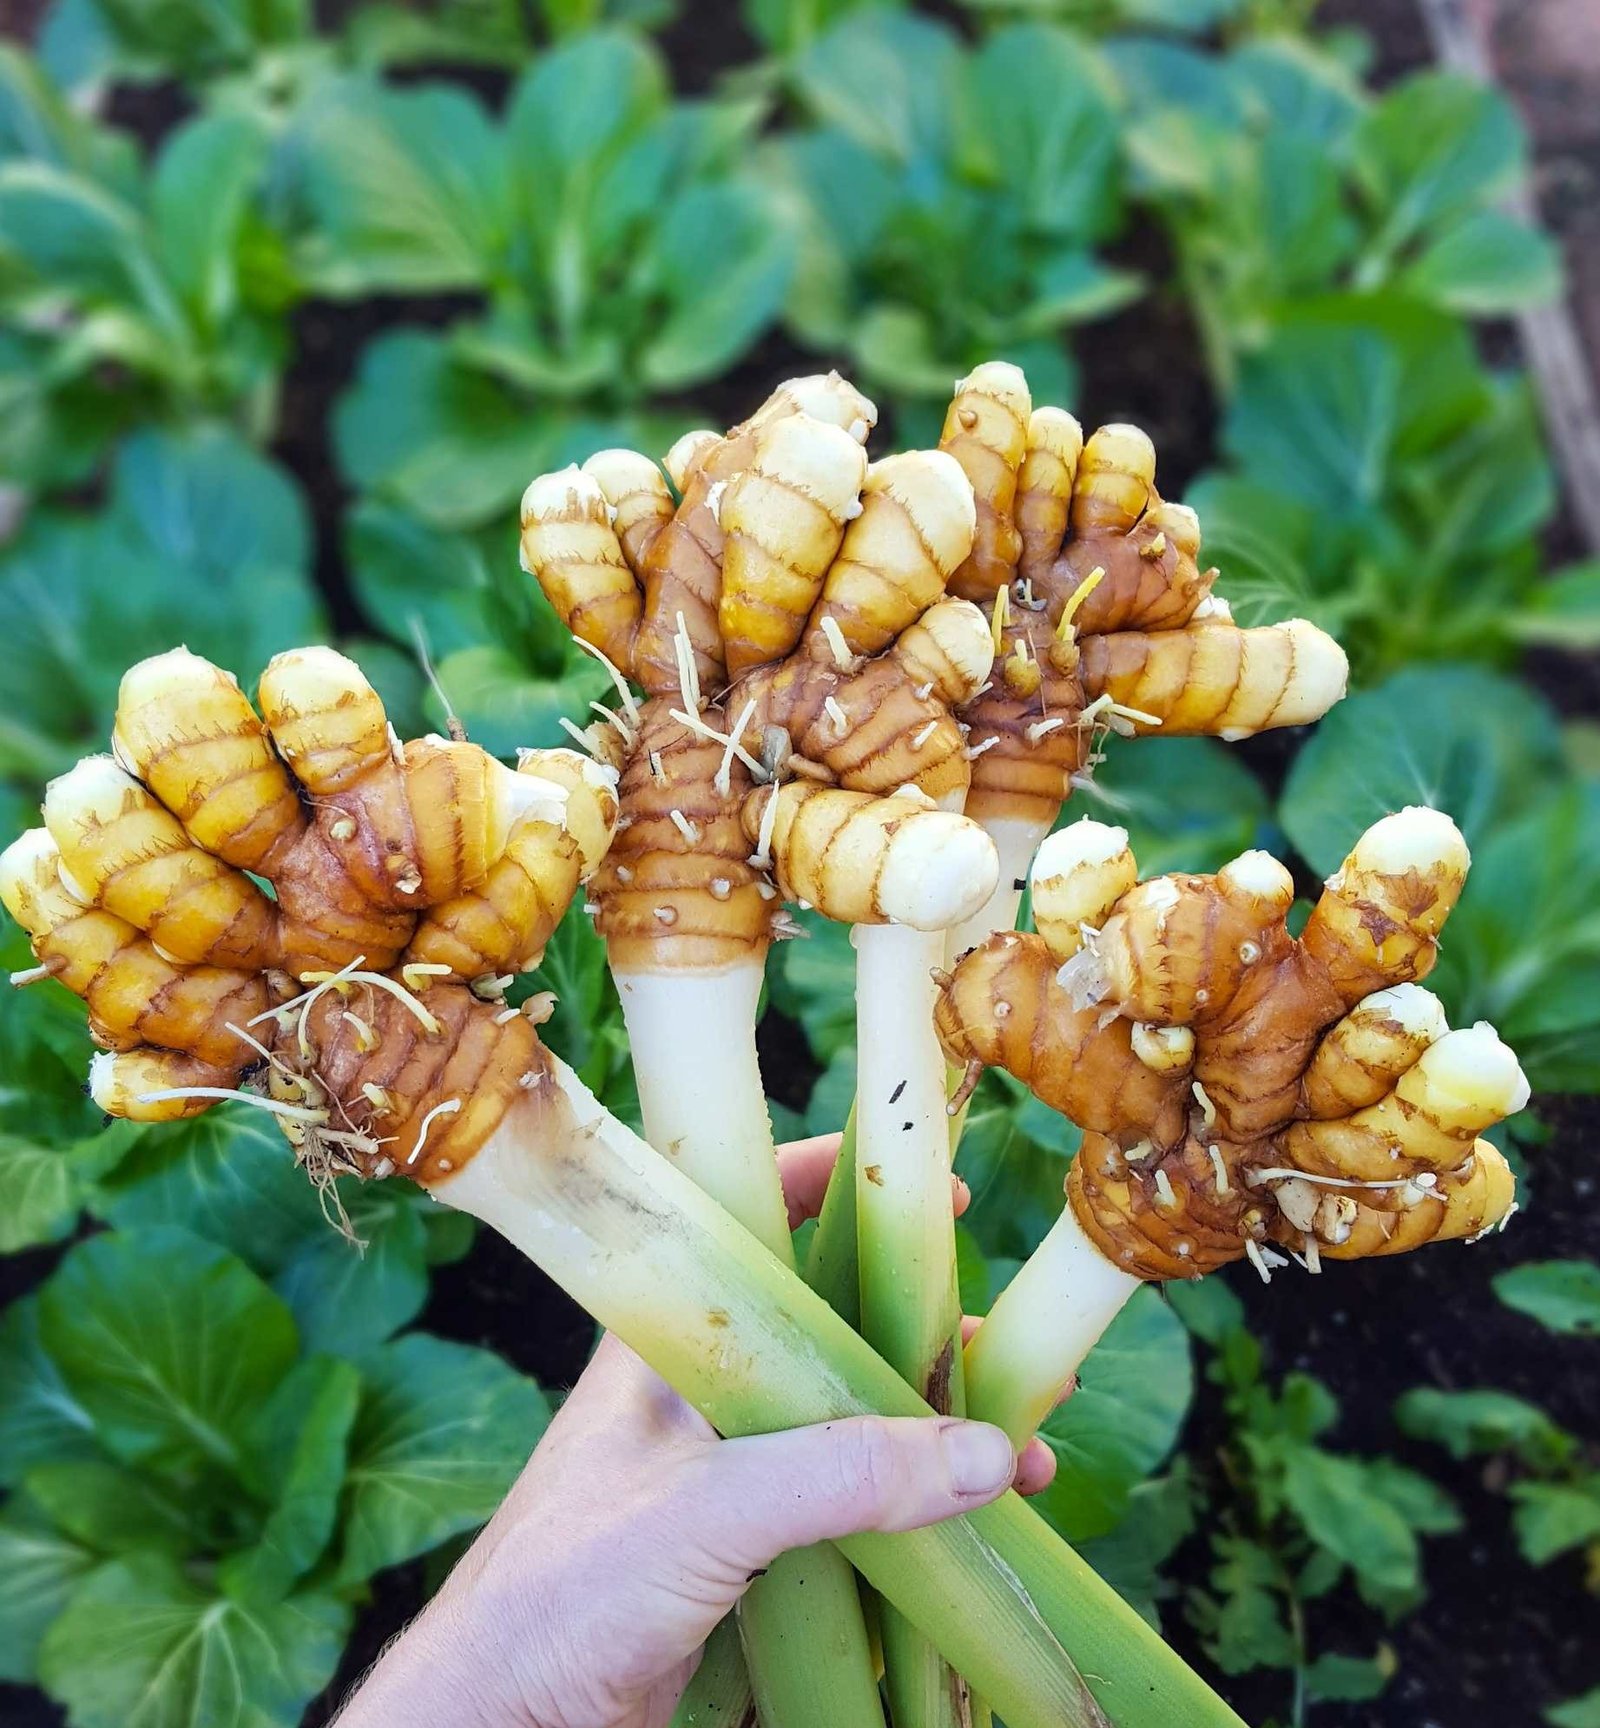
To harvest the turmeric, gently dig around the plant with a garden fork, being careful not to damage the rhizomes. Lift the plant from the soil, shake off excess dirt and cut off the leaves. Then, separate the rhizomes from the plant, being careful not to damage them.
Storing the Rhizomes
Turmeric rhizomes should be cleaned, dried, and cured before storage. To do this, place the rhizomes in a warm, dry place for a few days until the skin is dry and papery. Then, store the rhizomes in a cool, dry place, such as a pantry or cellar, in a paper or cloth bag.
Knowing When They’re Ready
The best way to determine if turmeric rhizomes are ready for harvest is by checking the leaves. If the leaves have started to yellow and die back, it’s a sign that the rhizomes are mature and ready to be harvested. Another indicator is the appearance of new shoots, which indicate that the plant is preparing to go dormant and that the rhizomes are ready to be harvested.
Output:
Harvesting Time
Turmeric is ready for harvest after 8-10 months of growth, when the leaves begin to yellow and die back. This usually occurs in late fall to early winter.
Harvesting Process
To harvest the turmeric, gently dig around the plant with a garden fork, being careful not to damage the rhizomes. Lift the plant from the soil, shake off excess dirt and cut off the leaves. Then, separate the rhizomes from the plant, being careful not to damage them.
Storing the Rhizomes
Turmeric rhizomes should be cleaned, dried, and cured before storage. To do this, place the rhizomes in a warm, dry place for a few days until the skin is dry and papery. Then, store the rhizomes in a cool, dry place, such as a pantry or cellar, in a paper or cloth bag.
Knowing When They’re Ready
The best way to determine if turmeric rhizomes are ready for harvest is by checking the leaves. If the leaves have started to yellow and die back, it’s a sign that the rhizomes are mature and ready to be harvested. Another indicator is the appearance of new shoots, which indicate that the plant is preparing to go dormant and that the rhizomes are ready to be harvested.
Growing turmeric in container – Conclusion
Conclusion
Growing turmeric in a pot at home is a great way to enjoy this versatile and flavorful spice in your own backyard. With the right soil, water, light, and care, you can produce a bounty of fresh turmeric for use in your cooking, teas, and other culinary creations.
By following the steps outlined in this guide, you’ll be well on your way to growing healthy, productive turmeric plants. So why not give it a try? Whether you’re an experienced gardener or just starting out, growing turmeric in a pot is a fun and rewarding experience.
Summary:
- Growing turmeric in a pot at home is a great way to enjoy fresh turmeric
- With the right soil, water, light, and care, you can produce a bounty of fresh turmeric
- By following the steps outlined in this guide, you’ll be well on your way to growing healthy, productive turmeric plants
- Growing turmeric in a pot is a fun and rewarding experience
Output:
Conclusion
Growing turmeric in a pot at home is a great way to enjoy this versatile and flavorful spice in your own backyard. With the right soil, water, light, and care, you can produce a bounty of fresh turmeric for use in your cooking, teas, and other culinary creations.
By following the steps outlined in this guide, you’ll be well on your way to growing healthy, productive turmeric plants. So why not give it a try? Whether you’re an experienced gardener or just starting out, growing turmeric in a pot is a fun and rewarding experience.
Summary:
- Growing turmeric in a pot at home is a great way to enjoy fresh turmeric
- With the right soil, water, light, and care, you can produce a bounty of fresh turmeric
- By following the steps outlined in this guide, you’ll be well on your way to growing healthy, productive turmeric plants
- Growing turmeric in a pot is a fun and rewarding experience