how to grow squash in a pot – [Beginners Guide]

Hey there! Are you looking to add some fresh, homegrown veggies to your home garden? Look no further than growing squash in pots!
I personally love growing squash in pots because it allows me to have control over the soil and drainage, and I can easily move the pots around to optimize sunlight exposure. Plus, it saves space in my yard, which is always a plus.
Did you know that you can even grow large varieties of squash in pots as long as they have a minimum of 15 gallons of soil? That’s right, you don’t need a large backyard to enjoy the delicious and nutritious benefits of homegrown squash.
In this guide, I’ll walk you through the steps of selecting the right pot, preparing the soil, and caring for your squash plants. Trust me, with a little care and attention, you’ll be enjoying fresh squash in no time!
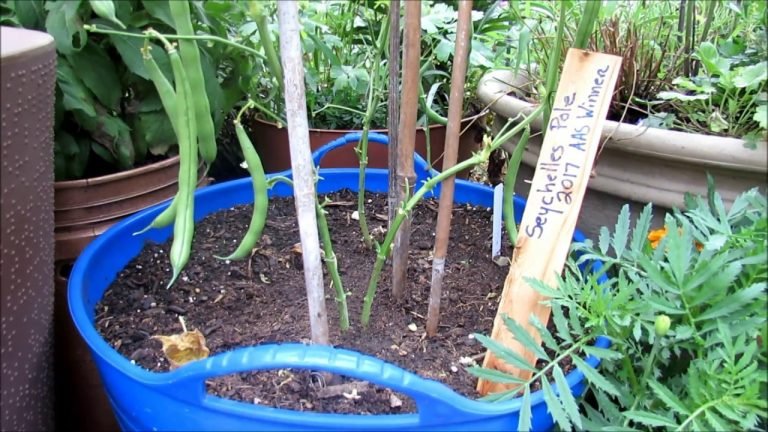
Pot or container selection
When it comes to growing squash in pots, the most important thing to consider is the size and capacity of the pot. As I mentioned earlier, squash plants need a minimum of 15 gallons of soil to thrive.
That means you’ll need a pot that is at least 18 inches deep and 24 inches wide to accommodate a mature squash plant. If you’re planting multiple squash plants in one pot, make sure to give them enough room to spread out and grow without overcrowding.
In terms of pot construction, you’ll want to make sure the pot has drainage holes at the bottom to allow for proper drainage and to prevent water from pooling at the bottom of the pot, which can lead to root rot.
Another important aspect is the material of the pot. A container made of terra cotta or clay is a good option as they are porous and allow air and water to reach the roots. Plastic pots are also good option as they are lightweight, durable and easy to move around. Avoid metal pots as they can get too hot in the sun and may harm the roots.
Make suitable soil mix
When it comes to growing squash in pots, the type of soil you use is just as important as the size and construction of the pot. Squash plants need well-draining, nutrient-rich soil to thrive.
A good soil mix for squash is a combination of equal parts potting soil, peat moss, and compost. This mixture will provide the necessary drainage and aeration for the roots, as well as the vital nutrients that squash plants need to grow strong and healthy.
In addition to the soil mix, you may also add a slow-release fertilizer to the soil. This will provide the squash plants with the necessary nutrients throughout the growing season.
It’s also important to note that squash plants prefer a slightly acidic soil with a pH between 6 and 6.5. You can test the pH of your soil mix with a soil test kit and adjust as needed.
By providing your squash plants with the correct soil mix, you’ll be setting them up for success and enjoying a bountiful harvest!
How to plant the squash?
Planting squash in pots at home is a fun and easy process that can be broken down into a few simple steps.
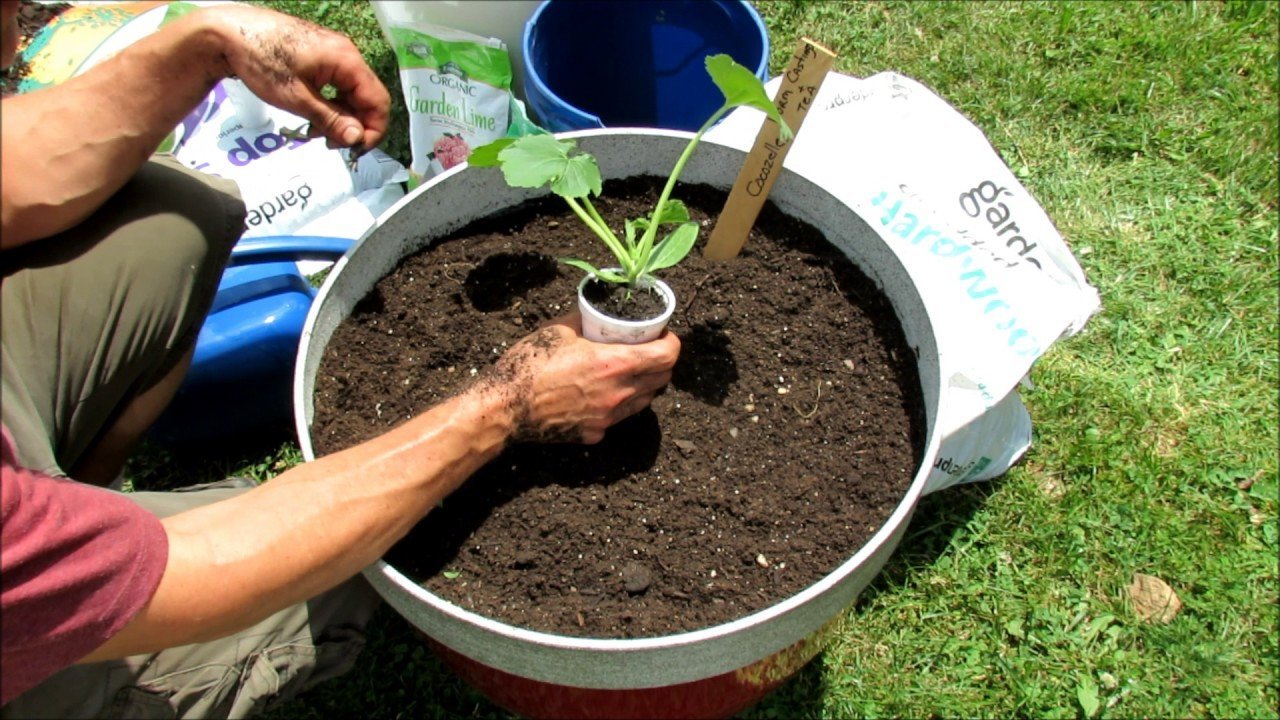
- Select the right pot: As I mentioned earlier, squash plants need a minimum of 15 gallons of soil. That means you’ll need a pot that is at least 18 inches deep and 24 inches wide to accommodate a mature squash plant. Make sure the pot has drainage holes at the bottom.
- Prepare the soil: Mix equal parts potting soil, peat moss, and compost. Add slow-release fertilizer to the soil. Squash plants prefer a slightly acidic soil with a pH between 6 and 6.5. Test the pH of your soil mix with a soil test kit and adjust as needed.
- Plant the squash: Sow the seeds 1-2 inch deep in the soil. Water the soil and keep it moist, but not waterlogged. Place the pot in a warm, sunny location.
- Care for the plant: Water the plant regularly, but avoid over watering. Fertilize the plant again after a few weeks. Once the seedlings have grown a few inches tall and have a few sets of leaves, thin them out so that only the strongest seedling remains in each pot. Keep an eye out for pests and diseases and take action if necessary.
- Harvest: Squash typically take around 50-70 days to mature. Once the fruits are firm and the skin is hard, they are ready to be harvested. Cut them from the vine with a sharp knife, leaving a small piece of stem attached to the fruit. Enjoy your homegrown squash!
By following these steps, you’ll be on your way to growing delicious and nutritious squash in no time!
How to care for squash?
Planting squash in pots at home is a fun and easy process that can be broken down into a few simple steps.
- Select the right pot: As I mentioned earlier, squash plants need a minimum of 15 gallons of soil. That means you’ll need a pot that is at least 18 inches deep and 24 inches wide to accommodate a mature squash plant. Make sure the pot has drainage holes at the bottom.
- Prepare the soil: Mix equal parts potting soil, peat moss, and compost. Add slow-release fertilizer to the soil. Squash plants prefer a slightly acidic soil with a pH between 6 and 6.5. Test the pH of your soil mix with a soil test kit and adjust as needed.
- Plant the squash: Sow the seeds 1-2 inch deep in the soil. Water the soil and keep it moist, but not waterlogged. Place the pot in a warm, sunny location.
- Care for the plant: Water the plant regularly, but avoid over watering. Fertilize the plant again after a few weeks. Once the seedlings have grown a few inches tall and have a few sets of leaves, thin them out so that only the strongest seedling remains in each pot. Keep an eye out for pests and diseases and take action if necessary.
- Harvest: Squash typically take around 50-70 days to mature. Once the fruits are firm and the skin is hard, they are ready to be harvested. Cut them from the vine with a sharp knife, leaving a small piece of stem attached to the fruit. Enjoy your homegrown squash!
By following these steps, you’ll be on your way to growing delicious and nutritious squash in no time!
Common problems
Pests
Squash plants, like many other vegetables, can fall victim to a variety of pests. Some common pests that can affect squash plants grown in pots include:
- Squash bugs
- Cucumber beetles
- Aphids
- Whiteflies
These pests can cause damage to the leaves and fruits, and can also spread diseases. To control pests, you can use insecticidal soap or neem oil, or even handpick them off the plants. It is important to monitor the plants regularly to detect any issues early.
Diseases
Squash plants can also fall victim to a variety of diseases. Some common diseases that can affect squash plants grown in pots include:
- Powdery mildew
- Downy mildew
- Bacterial wilt
- Fusarium wilt
These diseases can cause yellowing and wilting of the leaves, and can also affect the fruit. To prevent diseases, make sure to provide the plants with the proper care and nutrition, and avoid overcrowding and poor drainage. If a plant is infected, it is best to remove it to prevent the spread of the disease to the rest of the plants.
Other issues
Other issues that can affect squash plants grown in pots include:
- Poor production: Squash plants need a minimum of 15 gallons of soil. Make sure the pot is big enough to accommodate a mature plant. Also, check that the soil mix is well-draining and nutrient-rich.
- Lack of pollination: Pollination is necessary for fruit set. If the plants are not producing fruit, it could be due to a lack of pollination. You can hand-pollinate by transferring pollen from the male flowers to the female flowers, or you can plant a few bee-friendly plants nearby to attract pollinators.
- Over watering: Over watering can lead to root rot, which can be fatal for the plant. Water the plant regularly, but avoid over watering.
By being aware of these common problems, you can take the necessary steps to prevent them and ensure a successful harvest of delicious and nutritious squash from your home garden.
Harvesting & storing homegrown squash
When to Harvest
Squash plants typically take around 50-70 days to mature. The best time to harvest squash is when the fruits are firm and the skin is hard. The color should also be fully developed and consistent throughout the fruit. Here are a few indications that your squash is ready for harvest:
- The stem connecting the fruit to the plant should be hard and not easily twisted off.
- The skin of the fruit should be glossy and tough and should not easily punctured with a fingernail.
- The fruit should have reached its full size and shape.
How to harvest
When harvesting, it’s important to use a sharp knife to cut the fruit from the vine, leaving a small piece of stem attached to the fruit. This will help to prevent rotting and prolong storage life. Be gentle while handling the fruits, as they can be easily bruised.
Storage
Squash can be stored for several weeks if kept in cool, dry and well-ventilated place. Here are a few tips for storing squash:
- Store the fruits in a cool, dry place with good air circulation, such as a garage or basement.
- Keep the fruits off the ground and away from other fruits and vegetables, as they can release ethylene gas, which can cause the squash to ripen too quickly.
- Check the fruits regularly for any signs of rot and remove any that have begun to deteriorate, as this can cause the rest of the fruits to spoil more quickly.
By following these steps for harvesting, storing, and monitoring your squash, you can enjoy fresh, homegrown squash for several weeks after harvest.
Growing squash in container – Conclusion
In conclusion, growing squash in pots at home can be a fun and rewarding experience. By providing the plants with the proper care, nutrition, and environment, you can enjoy a bountiful harvest of delicious and nutritious squash.
Here are a few key takeaways to remember:
- Select a pot that is at least 18 inches deep and 24 inches wide with drainage holes.
- Prepare the soil with a mixture of equal parts potting soil, peat moss, and compost and adding slow-release fertilizer to the soil.
- Plant the seeds 1-2 inch deep in the soil, water the soil and place the pot in a warm, sunny location.
- Care for the plant by watering it regularly, fertilizing it after a few weeks, thinning out the seedlings and monitoring for pests and diseases.
- Harvest the fruits when they are firm and the skin is hard, and store them in a cool, dry place with good air circulation.
By following these steps, you’ll be on your way to growing delicious and nutritious squash in no time! I encourage you to give it a try and see the joy of harvesting your own homegrown vegetables. Happy gardening!