how to grow okra in a pot – [Beginners Guide]

Hey there! Are you looking for a fun and easy way to grow your own fresh veggies at home? Look no further than okra! Not only is it a delicious addition to soups, stews, and curries, but it’s also a great option for container gardening. In this guide, I’ll share my personal experience on how to grow okra in a pot.
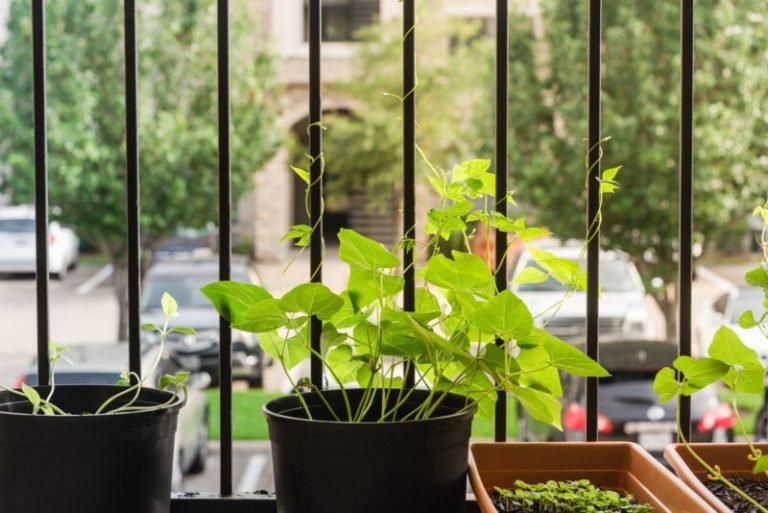
One of the best things about growing okra in a pot is that it doesn’t take up much space. You can even grow it on a balcony or patio, as long as it gets at least 6 hours of direct sunlight per day. And, because okra is a warm-season crop, it’s perfect for growing in pots during the summer months.
Another advantage of growing okra in a pot is that it’s relatively low maintenance. Okra plants only need to be watered once or twice a week, and they don’t require a lot of fertilizer. Just make sure the pot has drainage holes and use a high-quality potting mix.
So, are you ready to give it a try? Here’s a quick step-by-step guide on how to grow okra in a pot:
- Choose a container that is at least 12 inches deep and wide.
- Fill the container with a high-quality potting mix.
- Plant okra seeds about 1/2 inch deep and 3 inches apart.
- Water the seeds immediately after planting, and keep the soil consistently moist until seedlings emerge.
- Once seedlings are about 6 inches tall, thin them to about 1 plant per pot.
- Fertilize the plants every 4 weeks with a balanced fertilizer.
- Harvest the okra pods when they are 3 to 4 inches long and still tender.
And that’s it! With a little bit of care, you’ll have fresh and delicious okra to enjoy all summer long. And don’t forget to use up the surplus yield by freezing or canning them for future use.
Happy gardening!
Pot or container selection
When it comes to growing okra in a pot, the most important thing to consider is the size and capacity of the container. Okra plants can grow quite tall, up to 6 feet, and they also have a fairly extensive root system, so they need a container that is deep and wide enough to accommodate their growth.
For optimal growth, I recommend using a container that is at least 12 inches deep and wide. This will give the roots enough room to spread out and the plant enough space to grow tall. If you want to grow more than one plant, you can use bigger pots or select a container that is at least 18 inches deep and wide for each plant.
In terms of pot construction, it’s important to choose a container that is made of a durable material that can withstand the elements. Plastic, terracotta, or ceramic pots are all good options. However, it is important to ensure that the pot has drainage holes at the bottom to prevent waterlogging.
In summary, when growing okra in pots, it is important to choose a container that is at least 12 inches deep and wide, with drainage holes and made from durable material. This will provide enough space for the roots to spread out and the plant to grow tall.
Make suitable soil mix
When growing okra in a pot, the type of soil mix you use is crucial for optimal growth. Okra prefers well-drained soil that is rich in organic matter and has a slightly acidic to neutral pH of 6.0-7.0.
For the best results, I recommend using a high-quality potting mix that is specifically formulated for container gardening. This type of soil mix is usually a combination of peat moss, vermiculite, and perlite, which provide good drainage and aeration for the roots.
You can also add compost or well-rotted manure to the potting mix to provide additional organic matter and nutrients for the plants. The ideal composition should be about 70% potting mix and 30% compost or well-rotted manure.
It’s also important to make sure that the soil is moist but not waterlogged. You can use a moisture meter to check the soil moisture or simply stick your finger into the soil to check if it is dry or wet.
In summary, when growing okra in pots, it is important to use a high-quality potting mix that is specifically formulated for container gardening, and add compost or well-rotted manure to provide additional organic matter and nutrients. The soil should be well-drained, moist and with a pH range of 6.0-7.0. This will provide the correct soil composition for optimal growth of the okra plants.
How to plant the okra?
Growing okra in a pot at home is a relatively easy process, and with the right technique, you can have a bountiful harvest in no time! Here’s a step-by-step guide to help you get started:
- Choose the right container: As I mentioned earlier, okra plants need a container that is at least 12 inches deep and wide, with drainage holes and made from a durable material.
- Prepare the soil mix: Fill the container with a high-quality potting mix that is specifically formulated for container gardening and add compost or well-rotted manure to provide additional organic matter and nutrients. The ideal composition should be about 70% potting mix and 30% compost or well-rotted manure.
- Sow the seeds: Sow the okra seeds about 1/4 inch deep in the soil and space them about 3-4 inches apart. Cover the seeds lightly with soil and water them gently.
- Provide proper lighting and temperature: Okra plants need full sun to grow well, so place the container in a sunny spot. They also prefer warm temperatures, so if you live in a cool climate, you may need to provide some extra warmth with a heat mat or a grow light.
- Keep the soil moist: Keep the soil moist but not waterlogged. You can use a moisture meter to check the soil moisture or simply stick your finger into the soil to check if it is dry or wet.
- Fertilize and Pinching: Once the seedlings are established, fertilize them with a balanced, water-soluble fertilizer every 2-3 weeks. Also, Once the okra plants have grown about 4 inches tall, pinch off the growing tips to promote bushier growth.
And that’s it! With these simple steps, you should be able to grow okra successfully in a pot at home. Remember to be patient, as it can take up to 2-3 weeks for the seeds to germinate and up to 60 days for the plants to reach maturity. And always keep an eye on the plants, and address any issues as soon as they arise.
How to care for okra?
Watering Requirement
Okra plants require a consistent water supply to grow well. They should be watered deeply and regularly, about once or twice a week, depending on the weather and the size of the container. It’s important to keep the soil consistently moist but not waterlogged, as this can lead to root rot. A moisture meter can be used to check the soil moisture or simply stick your finger into the soil to check if it is dry or wet.
Fertilizer Requirement
Okra plants need a consistent supply of nutrients to grow well. Once the seedlings are established, fertilize them with a balanced, water-soluble fertilizer every 2-3 weeks. It is recommended to use a fertilizer that is high in nitrogen and potassium and low in phosphorus. Also, you can add a slow-release fertilizer to the potting mix before planting.
Sunlight Needs
Okra plants need full sun to grow well. They should be placed in a sunny spot where they will receive at least 6-8 hours of direct sunlight per day. If you live in a cool climate, you may need to provide some extra warmth with a heat mat or a grow light.
Pruning & Training
Pruning and training are important for okra plants to grow bushier and more productive. Once the okra plants have grown about 4 inches tall, pinch off the growing tips to promote bushier growth. This will encourage the plants to branch out and produce more fruit. It is also important to remove any yellow or damaged leaves to keep the plant healthy.
Other Care
- Check for pests and diseases: Okra plants can be susceptible to pests and diseases such as aphids, whiteflies, and powdery mildew. Keep an eye out for signs of infestation and address any issues as soon as they arise.
- Stake or Cage: As the plant grows tall and the fruits develop, it may need support to prevent it from falling over. Use a stake or cage to keep the plant upright and make harvesting easier.
- Harvesting: Okra is ready to harvest when the fruits are about 2-4 inches long and still tender. They should be picked regularly, as the more you harvest, the more fruit the plants will produce. Use a sharp knife or scissors to cut the fruit from the stem.
By following these care instructions, you can ensure that your okra plants will grow healthy and produce a bountiful harvest. Remember to be patient, as it can take up to 2-3 weeks for the seeds to germinate and up to 60 days for the plants to reach maturity. And always keep an eye on the plants, and address any issues as soon as they arise.
Common problems
Explain some common problems the okra grown in a pot at home face. Include information about pests, insects, dieseas, poor production and other issues. Write short paragraphs. Bold most important information. Use list and H3 headings where necessary to explain the steps. Make the final output in HTML format.
Harvesting & storing homegrown okra
When to Harvest
Okra is ready to harvest when the fruits are 2-4 inches long and still tender. The ideal time to harvest okra is in the morning when the weather is cool and the fruits are firm. As the fruits mature, they will become tough and woody, and the seeds will begin to harden. So, it is important to pick the fruits regularly to encourage the plant to produce more. A good rule of thumb is to harvest the okra every other day.
How to Harvest
Okra can be harvested by cutting the fruit from the stem with a sharp knife or scissors. Be sure to leave a small stem attached to the fruit to prevent rotting. When harvesting, be gentle and avoid bruising the fruits. Okra should be harvested when they are young and tender and as they grow, they become tough and woody.
Storing Okra
- Refrigeration: Okra can be stored in the refrigerator for 3-5 days in a perforated plastic bag. Keep the okra in a cool, dry place to prevent moisture and mold.
- Freezing: Okra can be frozen for up to 6 months. First, wash and dry the okra. Then, blanch them for 2-3 minutes in boiling water. Next, cool them down in ice water and pat dry. Finally, put them in airtight containers or freezer bags and store them in the freezer.
- Canning: Okra can also be canned for long-term storage. Use a pressure canner and follow the instructions for pickling or canning vegetables. This method is not recommended for beginners.
By keeping an eye on the size and maturity of the okra fruits and harvesting them at the right time, you can ensure that your homegrown okra will be fresh, tender, and delicious. And by storing them properly, you can enjoy your harvest all year round.
Growing okra in container – Conclusion
Conclusion
Growing okra in a pot is a great way to enjoy fresh, homegrown okra in a limited space. By following the steps outlined in this guide, you can successfully grow okra in a pot at home.
It is important to:
- Choose the right type of pot
- Use the appropriate soil mix
- Provide the right amount of water, sunlight, and fertilizer
- Harvest and store the okra properly
By taking care of your okra plants, you can enjoy fresh, tender, and delicious okra from your own backyard. Don’t be afraid to experiment and make adjustments as needed. Happy growing!