how to grow garlic in a pot – [Beginners Guide]

Hello fellow gardener! Are you looking for a fun and easy way to grow your own garlic at home? Then growing garlic in a pot might just be the perfect solution for you. As someone who loves growing their own herbs and vegetables, I can tell you from personal experience that growing garlic in a pot is not only a great idea but also a tasty one.
For starters, garlic is a low-maintenance crop that can grow in a variety of soil conditions, making it an ideal choice for beginners or anyone who has limited space for gardening. Moreover, growing garlic in pots means that you have control over the soil, drainage, and water, which can lead to healthier plants and a better yield.
Not to mention, fresh garlic has a much more intense flavor compared to store-bought garlic. It’s a great addition to a wide range of dishes, and it’s packed with health benefits such as helping to lower cholesterol, blood pressure and improve gut health.
So, are you ready to join me on this garlic-growing adventure? Let’s dive in and learn how to grow garlic in a pot.
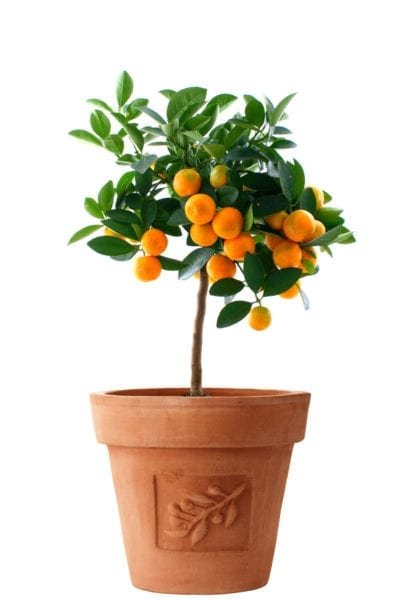
Pot or container selection
When it comes to growing garlic in pots, the type of pot you use is just as important as the soil and watering conditions. To ensure your garlic plants have enough room to grow and develop properly, you’ll need a pot that is at least 8-10 inches deep and 8-10 inches in diameter.
A pot with a capacity of 5-7 gallons is ideal, but you can also use smaller pots if you have limited space. Just keep in mind that the more garlic bulbs you plant, the more space they’ll need. It’s best to use a pot that is at least as deep as the length of the garlic bulb so the bulb can be completely covered by soil.
In terms of pot construction, a container made of clay, plastic, or ceramic is a good choice, as long as it has sufficient drainage holes to prevent water from pooling at the bottom of the pot. You should also consider using a pot with a saucer or tray to catch excess water and prevent the garlic from becoming waterlogged.
So, to summarize: when growing garlic in pots, aim for a pot that is at least 8-10 inches deep and 8-10 inches in diameter with a capacity of 5-7 gallons, and has proper drainage holes.
Make suitable soil mix
The type of soil you use when growing garlic in pots is crucial for its growth and development. Garlic prefers well-draining soil that is rich in organic matter. A good soil mix for growing garlic in pots is one that consists of a blend of equal parts of garden soil, compost, and sand or perlite.
It’s important to use garden soil instead of potting soil because garden soil is heavier and contains more nutrients. Compost provides organic matter, which helps improve soil structure and water-holding capacity. Sand or perlite is added to improve drainage, as garlic bulbs are susceptible to rotting if the soil stays too moist.
A soil pH of 6.0 to 6.8 is optimal for growing garlic. You can test the pH of your soil using a soil pH meter or a soil test kit, which is readily available at most garden centers.
In summary, the ideal soil mix for growing garlic in pots is a blend of equal parts of garden soil, compost, and sand or perlite, with a pH of 6.0 to 6.8. Making sure your soil has the correct composition will ensure that your garlic plants receive the necessary nutrients and have good drainage, leading to a healthy and bountiful harvest.
How to plant the garlic?
Planting garlic in a pot is a simple and rewarding process. Here’s a step-by-step guide to help you get started:
- Prepare the pot: Fill the pot with the soil mix you have prepared (a blend of equal parts garden soil, compost, and sand or perlite) and make sure it has proper drainage holes. Place a saucer or tray under the pot to catch excess water.
- Select garlic bulbs: Choose large, plump garlic bulbs with tight skin and no visible signs of disease or damage. Separate the individual cloves from the bulb, leaving the papery skin intact.
- Plant the cloves: Plant each clove about 4-6 inches apart and with the pointy end facing up. Cover each clove with soil, making sure it’s completely covered and the tip of the clove is about 2 inches below the surface.
- Water the garlic: Water the garlic immediately after planting and keep the soil moist, but not waterlogged. Water when the soil surface begins to feel dry to the touch.
- Place in a sunny location: Place the pot in a sunny location with at least 6 hours of direct sunlight a day. Garlic prefers a cool, sunny location.
- Wait and harvest: Wait for the garlic to grow and mature, which usually takes 6-8 months. When the leaves start to yellow and die back, it’s time to harvest your garlic. Simply pull the garlic bulbs out of the soil and allow them to dry in a warm, well-ventilated area.
With these simple steps, you’ll be on your way to growing garlic in a pot and enjoying the benefits of fresh garlic right from your own home. Happy gardening!
How to care for garlic?
Watering Requirement
Garlic requires consistent moisture to grow and develop properly, but be careful not to overwater. Water the garlic immediately after planting, then water when the soil surface begins to feel dry to the touch. It’s important to not let the soil become waterlogged, as this can lead to root rot.
Water the garlic deeply but infrequently, allowing the soil to dry out slightly between waterings. A good rule of thumb is to water when the top inch of soil is dry. In hot weather, you may need to water more frequently to keep the soil consistently moist.
Fertilizer Requirement
Garlic is a heavy feeder and benefits from a monthly application of a balanced, all-purpose fertilizer, such as 10-10-10. Start fertilizing when the garlic begins to actively grow, usually about a month after planting, and continue until the end of June.
You can also add compost or aged manure to the soil each spring to help provide additional nutrients. Avoid using fresh manure, as this can burn the roots and stunt growth.
Sunlight Needs
Garlic requires at least 6 hours of direct sunlight a day to grow and mature properly. Place the pot in a sunny location that provides plenty of light, preferably in an area with a cool temperature. If you live in a hot climate, you may need to provide some shade during the hottest part of the day to prevent the soil from drying out too quickly.
Pruning & Training
Garlic does not require pruning or training. Simply remove any yellow or dead leaves as they appear to keep the plant healthy and encourage maximum growth.
Other Care
Thinning: If the garlic cloves are too close together, the bulbs may not have enough room to grow and develop properly. Thin the garlic cloves when the shoots are 4-6 inches tall, leaving only the healthiest and strongest cloves.
Mulching: Mulching helps to conserve moisture and regulate soil temperature. Spread a 2-3 inch layer of straw or dried leaves over the soil around the garlic to act as a mulch.
By following these care instructions, you will ensure that your garlic has the best conditions to grow and thrive, leading to a healthy and bountiful harvest.
Common problems
Pests and Diseases
Garlic grown in pots is susceptible to the same pests and diseases as garlic grown in the ground. Common pests include cutworms, slugs, and aphids, while common diseases include downy mildew, white rot, and rust.
To prevent pests and diseases, practice good sanitation and keep the garlic plants well-spaced to promote good air circulation. If pests or diseases do occur, you can use neem oil, insecticidal soap, or other organic solutions to control them.
Poor Production
There are several reasons why garlic grown in pots may not produce well, including:
- Insufficient sunlight
- Inadequate moisture
- Overcrowding
- Poor soil quality
- Lack of nutrients
To ensure maximum production, make sure that the garlic receives at least 6 hours of direct sunlight a day and that the soil is consistently moist but not waterlogged. Provide the garlic with adequate nutrients, and make sure to thin the cloves if they are overcrowded.
Small Bulbs
Garlic bulbs may be small if they receive insufficient sunlight or nutrients, or if they are overcrowded. To prevent small bulbs, make sure the garlic receives adequate sunlight and nutrients and is not overcrowded in the pot.
By taking steps to prevent and address these common problems, you can ensure that your garlic grown in pots is healthy and produces a bountiful harvest.
Harvesting & storing homegrown garlic
When to Harvest
Garlic is ready to harvest when the leaves on the top of the plant start to yellow and the bottom leaves begin to dry out. This typically occurs 6 to 8 months after planting.
Harvesting
To harvest garlic, gently lift the plant out of the pot and shake off any excess soil. Use a garden fork or your hands to carefully loosen the bulbs from the soil, being careful not to damage the bulbs.
Storing
To store garlic, cure the bulbs in a warm, dry place for 2 to 4 weeks. After curing, cut off the tops, leaving about 1 inch of stem attached to each bulb, and store the bulbs in a cool, dry place. Properly stored garlic can last for several months.
By following these steps for harvesting and storing garlic, you can enjoy the delicious and nutritious bulbs from your homegrown crop for months to come.
Growing garlic in container – Conclusion
Conclusion
Growing garlic in pots is a great way to enjoy fresh, flavorful garlic right from your own home. By following the steps outlined in this guide, you can have a successful and bountiful harvest of garlic in no time.
To recap, the key steps to growing garlic in a pot include:
- Choosing the right pot and soil mix
- Planting garlic cloves in the pot
- Providing proper care and attention, including watering, fertilizing, and pruning
- Harvesting and storing the garlic properly
By implementing these steps, you can enjoy delicious and nutritious homegrown garlic in your own home. So why not give it a try today?