how to grow runner beans in a pot – [Beginners Guide]

Hey there! I’m so glad you’re interested in growing runner beans in pots. Growing your own vegetables is a fantastic hobby and I’m sure you’ll find it both rewarding and enjoyable. I’m a huge fan of growing my own food and I have had great success with growing runner beans in pots, both indoors and outdoors. Let me share with you why I think growing runner beans in pots is a great idea and what you need to know to get started.
Why grow runner beans in pots?
Growing runner beans in pots is a great option for those who live in apartments or have limited garden space. Runner beans are a popular vegetable to grow, and they’re relatively easy to care for, making them a great choice for beginner gardeners. Additionally, they’re a good source of vitamins and minerals, and they taste great too!
Getting started
To grow runner beans in pots, you’ll need a few supplies. First, you’ll need a pot that’s at least 20 cm deep and 30 cm wide. Fill the pot with a good quality potting mix and make sure it’s well-draining. Next, plant your runner bean seeds about 2 cm deep and water them well. Place your pot in a sunny spot and water it regularly. Before you know it, you’ll have healthy runner bean plants growing in your pot!
I hope this introduction has been helpful and has given you the confidence to give growing runner beans in pots a try. With a little care and attention, you’ll be harvesting your own delicious runner beans in no time!
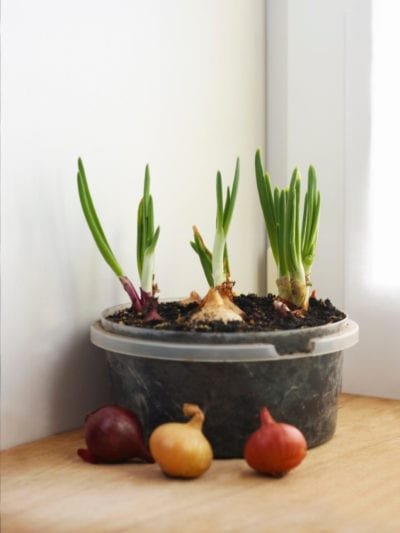
Pot or container selection
To grow runner beans at home, you’ll need a suitable pot. Choosing the right pot will ensure that your runner bean plants have enough space to grow and develop properly.
Pot Size and Capacity
For optimal growth, you’ll need a pot that’s at least 20 cm deep and 30 cm wide. This size of pot will give the roots of your runner bean plants enough room to spread and absorb water and nutrients. If you have limited space, you can grow runner beans in smaller pots, but keep in mind that smaller pots will need to be watered more frequently.
Pot Construction
When it comes to the construction of the pot, it’s important to choose a pot that has good drainage. Runner bean plants need a well-draining soil mix to prevent root rot, so make sure the pot you choose has at least one or two holes in the bottom for excess water to drain away. Additionally, a good quality potting mix is important for growing runner beans in pots, as this will ensure that your plants have the nutrients they need to grow and develop properly.
In summary, when choosing a pot for growing runner beans at home, look for a pot that’s at least 20 cm deep and 30 cm wide, and make sure it has good drainage and a good quality potting mix. With the right pot, your runner bean plants will have everything they need to grow and thrive!
Make suitable soil mix
To grow runner beans at home, you’ll need to use the right soil mix. The type and mixture of soil you choose will play a big role in the growth and development of your runner bean plants.
Soil Type
When it comes to soil type, a good quality potting mix is recommended for growing runner beans in pots. Potting mix is a pre-made blend of soil, compost, and other organic matter that’s specifically designed for container gardening. It provides the right balance of nutrients and water-retaining capacity for plants grown in pots.
Soil Mixture
In terms of soil mixture, runner bean plants prefer a soil mix that’s well-draining and slightly on the acidic side, with a pH between 6.0 and 6.5. Make sure the potting mix you choose has the right mix of ingredients to provide the right environment for your runner bean plants to grow and thrive. Good quality potting mixes will usually include peat moss, vermiculite, perlite, and composted bark, among other ingredients.
Why Correct Soil Composition is Essential
Having the correct soil composition is essential for optimal growth of runner beans. The right soil mix will provide the right balance of nutrients, water, and air for the roots of your runner bean plants. If the soil mix is too heavy or doesn’t drain well, this can lead to root rot and other problems. On the other hand, if the soil mix is too light or doesn’t retain enough moisture, this can cause the plants to dry out and become stressed. The right soil mix is the key to happy, healthy runner bean plants.
In conclusion, when growing runner beans at home, make sure to choose a good quality potting mix that’s well-draining and slightly on the acidic side. With the right soil mix, your runner bean plants will have everything they need to grow and thrive!
How to plant the runner beans?
Growing runner beans at home in a pot is a fun and rewarding project. With the right pot, soil mix, and some basic knowledge, you can have a thriving crop of runner beans in no time! Here’s a step-by-step guide to help you get started:
Step 1: Choose a Suitable Pot
Choose a pot that’s at least 20 cm deep and 30 cm wide, and make sure it has good drainage and a quality potting mix. You can use any type of pot, as long as it meets these requirements.
Step 2: Prepare the Soil Mix
Fill the pot with a good quality potting mix, making sure to leave enough room for the runner bean plants to grow. You can add a slow-release fertilizer to the soil mix if you wish, but this is optional.
Step 3: Sow the Seeds
Sow the runner bean seeds in the pot, planting them about 2 cm deep and 10 cm apart. If you’re planting multiple seeds, it’s best to plant them in a small group rather than a single row. Water the seeds gently, taking care not to wash them out of the pot.
Step 4: Water and Cover
Water the seeds regularly, making sure to keep the soil moist but not waterlogged. Cover the pot with a lid or plastic wrap to help keep the soil moist and warm, and remove the cover once the seeds have germinated.
Step 5: Transplant
Once the seedlings have grown to about 10 cm tall, transplant them into larger pots or into the garden. Space the plants about 30 cm apart to give them enough room to grow and develop properly.
Step 6: Water and Fertilize
Water the runner bean plants regularly, making sure to keep the soil moist but not waterlogged. Fertilize the plants with a balanced fertilizer every 4-6 weeks to help promote healthy growth.
With these simple steps, you’ll be well on your way to growing a thriving crop of runner beans at home!
How to care for runner beans?
Watering Requirements
Runner beans need to be kept consistently moist, but not waterlogged. Water the plants deeply once or twice a week, or as often as necessary to keep the soil moist. During hot or dry weather, you may need to water more frequently to prevent the soil from drying out. Be careful not to get water on the foliage, as this can encourage the growth of fungal diseases.
Fertilizer Requirements
Runner beans are heavy feeders and will benefit from regular fertilization. Use a balanced fertilizer, such as a 10-10-10, and apply it every 4-6 weeks. You can also add compost or well-rotted manure to the soil mix to provide additional nutrients. If you’re using a slow-release fertilizer, you can skip this step, as the fertilizer will release nutrients gradually over time.
Sunlight Needs
Runner beans need full sun to grow and produce well. Place the pot in a sunny location that gets at least 6 hours of direct sun per day. If you don’t have a sunny location, you can use grow lights to provide the plants with the light they need.
Pruning & Training
Runner beans will need to be trained and pruned to keep them healthy and productive. As the plants grow, tie them to a support to prevent them from falling over. You can use a stake, trellis, or tomato cage to support the plants. Prune off any yellow or damaged leaves, and remove any side shoots that develop at the base of the plant to encourage strong growth.
Other Care
Pest and Disease Control: Keep an eye out for pests and diseases, and take action promptly if you see any signs of problems. Common pests include aphids and whiteflies, while common diseases include powdery mildew and anthracnose. You can use insecticidal soap or neem oil to control pests, and keep the plants well-ventilated and spaced to reduce the risk of disease.
Harvesting: Runner beans are ready to harvest when the pods are about 20 cm long and the beans are firm. Pick the beans regularly to encourage continued production, and harvest the entire plant before the first frost in fall.
With these care tips, you’ll be able to grow a thriving crop of runner beans in a pot at home.
Common problems
Pests
Common pests that attack runner beans grown in pots include aphids, whiteflies, and spider mites. These pests can cause damage to the leaves and reduce the plant’s ability to photosynthesize. To control pests, you can use insecticidal soap or neem oil, or simply remove the affected leaves and dispose of them.
Diseases
Diseases that can affect runner beans grown in pots include powdery mildew, anthracnose, and rust. These diseases can cause yellowing and wilting of the leaves, as well as stunted growth and reduced production. To prevent disease, keep the plants well-ventilated, avoid overhead watering, and remove any infected leaves promptly. You can also use a fungicide to control the spread of disease.
Poor Production
Poor production can be caused by several factors, including lack of sunlight, poor soil quality, and incorrect watering. Make sure your pot is in a sunny location that gets at least 6 hours of direct sun per day, and that the soil is well-drained and of good quality. Water the plants regularly to keep the soil moist, but not waterlogged.
Other factors that can cause poor production include over-fertilization, high temperatures, and lack of support for the plants. Keep the fertilizer balanced and avoid over-fertilizing, and make sure the plants are well-supported to prevent them from falling over.
Yellowing of Leaves
Yellowing of the leaves can be a sign of several problems, including disease, overwatering, or lack of nutrients. Check the soil moisture level and adjust as necessary, and make sure the plants are getting the nutrients they need by fertilizing regularly. If the yellowing persists, it could be a sign of disease, in which case you should remove the affected leaves promptly and take appropriate action to control the spread of the disease.
By being aware of these common problems and taking appropriate action, you can keep your runner beans healthy and productive, and enjoy a bountiful harvest from your pot at home.
Harvesting & storing homegrown runner beans
Harvesting Time
Runner beans are ready for harvest about 10 to 12 weeks after planting, when the pods are still tender and before the seeds start to mature. To test for readiness, gently squeeze the pod and if it gives slightly, it’s ready to be picked.
Harvesting Method
Harvest the runner beans by breaking the pods from the plant with a quick snap, taking care not to damage the plant. You can also use a sharp knife to cut the pods from the plant. Regular harvesting will encourage the plant to produce more beans. Harvest the beans every two to three days to keep the plants productive.
Storing Homegrown Runner Beans
Runner beans should be used as soon as possible after harvesting, as they do not store well. If you have a surplus, they can be blanched and frozen for later use. To blanch the beans, simply boil them for 2-3 minutes, then drain and plunge into cold water to stop the cooking process. Allow the beans to cool completely before freezing.
Another option is to store the runner beans in the refrigerator for a few days. They should be wrapped in a damp cloth or paper towel to keep them fresh. Use the stored runner beans as soon as possible to enjoy their maximum flavor and quality.
By harvesting and storing the runner beans correctly, you can enjoy the fruits of your labor for weeks to come.
Growing runner beans in container – Conclusion
Conclusion
Growing runner beans in a pot is a great way to enjoy fresh, homegrown vegetables right in your own backyard. By following the steps outlined in this guide, you can successfully grow and care for runner beans in a pot, and reap the benefits of fresh, delicious and nutritious beans.
Key Takeaways:
- Choose a pot that is at least 12 inches deep and 12 inches in diameter.
- Use a soil mix that is well-draining and rich in organic matter.
- Plant the runner beans in the pot after all danger of frost has passed.
- Water the plants regularly, and fertilize them every 2 weeks.
- Place the pot in an area that receives full sun for at least 6 hours a day.
- Prune and train the plants to encourage healthy growth and productivity.
- Harvest the runner beans when they are still tender and before the seeds start to mature.
- Store the runner beans in the refrigerator for a few days, or blanch and freeze for later use.
Whether you’re a seasoned gardener or a beginner, growing runner beans in a pot is a fun and rewarding experience. With a little patience and care, you can enjoy the delicious taste of fresh runner beans all season long!