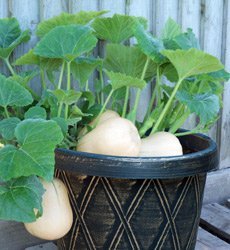
how to grow yellow squash in a pot – [Beginners Guide]

Growing yellow squash in pots is a great idea for those who love to grow their own food but don’t have a lot of outdoor space. I started growing yellow squash in pots a few years back, and it has been a wonderful experience so far. In this article, I’ll share my personal tips and tricks on how to grow yellow squash in pots successfully.
Yellow squash is a versatile vegetable that can be used in a variety of dishes, from salads to soups, stews, and casseroles. It’s a great addition to any home garden, and the best part is, it’s easy to grow in pots. Growing yellow squash in pots is a convenient way to have fresh, organic, and pesticide-free vegetables right at your fingertips.
Whether you live in a small apartment or a house with a small yard, growing yellow squash in pots is a great option. Pots can be placed on balconies, patios, or even indoors near a sunny window. Yellow squash is a fast-growing plant, and with proper care, you can harvest fresh yellow squash within 2-3 months.
In the next sections, I’ll discuss the steps you need to follow to grow yellow squash in pots successfully. So, whether you’re a seasoned gardener or just starting out, this article is for you. Let’s get started!
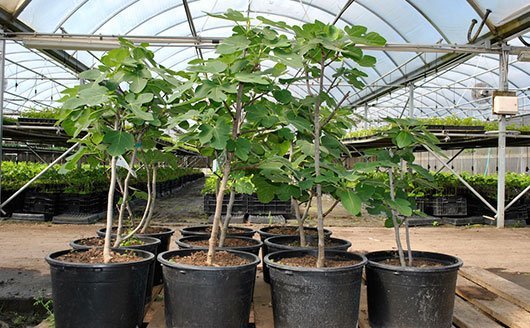
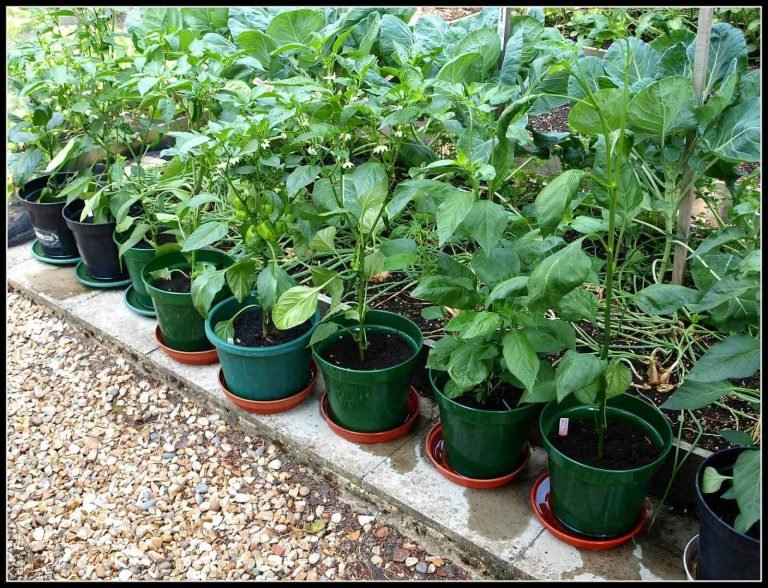
Pot or container selection
When it comes to growing yellow squash in pots, choosing the right pot is crucial for the success of your garden. A good pot should provide adequate room for the roots to grow and allow for proper drainage.
Pot Size: For yellow squash, a pot that is at least 12 inches in diameter and 12 inches deep is ideal. This size of pot will provide enough room for the yellow squash plant to grow, and also allow for proper drainage.
Pot Capacity: The pot should have a capacity of 5-7 gallons, which is enough to hold a good amount of soil and provide enough nutrients for the plant to grow.
Pot Construction: The pot should be made of a material that is durable, lightweight, and provides good insulation. Terracotta pots are a popular choice for growing yellow squash, but plastic pots are also a great option as they are lighter and less expensive. Whichever material you choose, make sure the pot has good drainage holes at the bottom to prevent water from accumulating in the pot and causing root rot.
In summary, when choosing a pot for growing yellow squash, look for one that is at least 12 inches in diameter and 12 inches deep, with a capacity of 5-7 gallons. The pot should have good drainage holes and be made of a material that is durable, lightweight, and provides good insulation.
Make suitable soil mix
Soil Type for Yellow Squash:
Yellow squash plants prefer a rich, well-draining soil with a pH range between 6.0 and 7.0. A soil mix that contains a good amount of organic matter, such as compost or well-rotted manure, can help improve drainage and provide the plants with the nutrients they need for optimal growth.
Soil Mixture for Yellow Squash:
A soil mixture of equal parts garden soil, compost, and sand is suitable for growing yellow squash. Adding a slow-release fertilizer such as 14-14-14 to the soil at the time of planting can also help provide the plants with the necessary nutrients throughout their growing season.
Importance of Correct Soil Composition:
The correct soil composition is essential for optimal growth of yellow squash plants. Poorly draining soil can lead to root rot and other diseases, while soil that is too alkaline can cause stunted growth and yellowing of the leaves. Maintaining the correct soil pH and adding organic matter to improve soil structure can help ensure healthy and productive plants.
HTML format output:
Soil Type for Yellow Squash:
Yellow squash plants prefer a rich, well-draining soil with a pH range between 6.0 and 7.0. A soil mix that contains a good amount of organic matter, such as compost or well-rotted manure, can help improve drainage and provide the plants with the nutrients they need for optimal growth.
Soil Mixture for Yellow Squash:
A soil mixture of equal parts garden soil, compost, and sand is suitable for growing yellow squash. Adding a slow-release fertilizer such as 14-14-14 to the soil at the time of planting can also help provide the plants with the necessary nutrients throughout their growing season.
Importance of Correct Soil Composition:
The correct soil composition is essential for optimal growth of yellow squash plants. Poorly draining soil can lead to root rot and other diseases, while soil that is too alkaline can cause stunted growth and yellowing of the leaves. Maintaining the correct soil pH and adding organic matter to improve soil structure can help ensure healthy and productive plants.
How to plant the yellow squash?
Step by Step Guide for Planting Yellow Squash in a Pot at Home:
Step 1: Choose the Right Pot
Select a pot that is at least 12-18 inches in diameter and has adequate drainage holes. Fill the pot with a good quality potting mix that is well-draining and rich in organic matter.
Step 2: Sow the Seeds
Sow the yellow squash seeds about 1 inch deep in the potting mix. Space the seeds about 12 inches apart. Cover the seeds with soil and gently press down to ensure good soil to seed contact.
Step 3: Water the Seeds
Water the seeds gently after planting, and keep the soil consistently moist but not waterlogged. A watering can with a fine rose is best for this task to avoid damaging the newly sown seeds.
Step 4: Place the Pot in a Sunny Location
Place the pot in a sunny location that receives at least 6 hours of direct sunlight per day. Keep the pot in a warm, sheltered spot until the seeds germinate, which should take 5-7 days.
Step 5: Thin the Seedlings
Once the seedlings have emerged, thin them to the strongest one or two plants per pot. This will give the remaining plants room to grow and develop into healthy, productive plants.
Step 6: Fertilize and Water Regularly
Fertilize the plants every 2-3 weeks with a balanced water-soluble fertilizer. Water the plants regularly to keep the soil evenly moist, and make sure to never let the soil dry out completely.
HTML format output:
Step by Step Guide for Planting Yellow Squash in a Pot at Home:
-
Step 1: Choose the Right Pot
Select a pot that is at least 12-18 inches in diameter and has adequate drainage holes. Fill the pot with a good quality potting mix that is well-draining and rich in organic matter. -
Step 2: Sow the Seeds
Sow the yellow squash seeds about 1 inch deep in the potting mix. Space the seeds about 12 inches apart. Cover the seeds with soil and gently press down to ensure good soil to seed contact. -
Step 3: Water the Seeds
Water the seeds gently after planting, and keep the soil consistently moist but not waterlogged. A watering can with a fine rose is best for this task to avoid damaging the newly sown seeds. -
Step 4: Place the Pot in a Sunny Location
Place the pot in a sunny location that receives at least 6 hours of direct sunlight per day. Keep the pot in a warm, sheltered spot until the seeds germinate, which should take 5-7 days.How to care for yellow squash?
Caring for Yellow Squash in a Pot at Home:
Watering Requirement:
- Water the yellow squash regularly, making sure to keep the soil consistently moist but not waterlogged.
- A watering can with a fine rose is best for this task to avoid damaging the delicate plants.
- Never let the soil dry out completely, as this can stress the plants and affect their growth and production.
Fertilizer Requirement:
- Fertilize the yellow squash every 2-3 weeks with a balanced water-soluble fertilizer.
- This will provide the plants with the nutrients they need to grow strong and produce a good crop of fruit.
Sunlight Needs:
- Yellow squash plants need plenty of sunlight to grow and produce fruit.
- Place the pot in a sunny location that receives at least 6 hours of direct sunlight per day.
- In hot climates, you may need to provide some shade during the hottest part of the day to protect the plants from heat stress.
Pruning & Training:
- Yellow squash plants are vigorous growers and may need to be pruned and trained to maintain their shape and size.
- Pinch out the tips of the shoots to encourage bushier growth and remove any dead or yellowing leaves regularly to keep the plant healthy and productive.
Other Care:
- Keep the area around the yellow squash plant weed-free to prevent competition for moisture and nutrients.
- Stake the plants if necessary to support the weight of the fruit and prevent the plants from collapsing under their own weight.
- Keep an eye out for pests and diseases, and take appropriate action if necessary to keep the plants healthy and productive.
HTML format output:
Caring for Yellow Squash in a Pot at Home:
Watering Requirement:
- Water the yellow squash regularly, making sure to keep the soil consistently moist but not waterlogged.
- A watering can with a fine rose is best for this task to avoid damaging the delicate plants.
- Never let the soil dry out completely, as this can stress the plants and affect their growth and production.
Fertilizer Requirement:
- Fertilize the yellow squash every 2-3 weeks with a balanced water-soluble fertilizer.
- This will provide the plants with the nutrients they need to grow strong and produce a good crop of fruit.
Common problems
Common Problems with Yellow Squash Grown in a Pot at Home:
Pests and Insects:
- Yellow squash plants can be affected by a range of pests and insects, including aphids, squash bugs, and whiteflies.
- These pests can cause damage to the leaves and fruit, and can also transmit diseases that can further harm the plant.
- Regularly inspect your yellow squash plants for signs of pest damage, and take appropriate action to control the pests, such as using insecticidal soap or neem oil.
Diseases:
- Yellow squash plants are susceptible to a range of diseases, including powdery mildew, downy mildew, and mosaic virus.
- These diseases can cause yellowing of the leaves, stunted growth, and reduced fruit production.
- Prevent disease by providing good growing conditions, such as adequate ventilation and well-draining soil, and by avoiding overhead watering which can encourage the spread of disease.
Poor Production:
- Yellow squash plants can sometimes suffer from poor production due to a range of factors, including poor growing conditions, lack of pollination, and inadequate nutrition.
- Ensure your yellow squash plants receive adequate sunlight, water, and fertilizer, and consider hand-pollinating the flowers if necessary to improve fruit set.
Other Issues:
- Yellow squash plants can also be affected by other issues, such as blossom end rot, which causes the fruit to rot at the blossom end.
- This can be caused by a calcium deficiency in the soil or uneven watering, and can be prevented by ensuring adequate calcium levels and consistent watering practices.
HTML format output:
Common Problems with Yellow Squash Grown in a Pot at Home:
Pests and Insects:
- Yellow squash plants can be affected by a range of pests and insects, including aphids, squash bugs, and whiteflies.
- These pests can cause damage to the leaves and fruit, and can also transmit diseases that can further harm the plant.
- Regularly inspect your yellow squash plants for signs of pest damage, and take appropriate action to control the pests, such as using insecticidal soap or neem oil.
Diseases:
- Yellow squash plants are susceptible to a range of diseases, including powdery mildew, downy mildew, and mosaic virus.
- These diseases can cause yellowing of the leaves, stunted growth, and reduced fruit production.
- Prevent disease by providing good growing conditions, such as adequate ventilation and well-draining soil, and by avoiding overhead watering which can encourage the spread of disease.
Harvesting & storing homegrown yellow squash
Harvesting and Storing Homegrown Yellow Squash:
When to Harvest:
- Yellow squash are usually ready to harvest around 50-70 days after planting, when the fruit are still small and tender.
- Check the size and color of the fruit, which should be a bright, even yellow and should not be too large or tough.
- Pick the squash gently using pruning shears or a sharp knife, leaving a small portion of stem attached to the fruit.
How to Store:
- Store yellow squash in a cool, dry place, such as a pantry or root cellar, to extend their shelf life.
- Keep the squash dry and unwashed, and place them in a single layer, avoiding stacking or bruising.
- Yellow squash can be stored for up to a week, but it is best to use them as soon as possible for maximum freshness and flavor.
HTML format output:
Harvesting and Storing Homegrown Yellow Squash:
When to Harvest:
- Yellow squash are usually ready to harvest around 50-70 days after planting, when the fruit are still small and tender.
- Check the size and color of the fruit, which should be a bright, even yellow and should not be too large or tough.
- Pick the squash gently using pruning shears or a sharp knife, leaving a small portion of stem attached to the fruit.
How to Store:
- Store yellow squash in a cool, dry place, such as a pantry or root cellar, to extend their shelf life.
- Keep the squash dry and unwashed, and place them in a single layer, avoiding stacking or bruising.
- Yellow squash can be stored for up to a week, but it is best to use them as soon as possible for maximum freshness and flavor.
Growing yellow squash in container – Conclusion
Conclusion:
Growing yellow squash in a pot at home can be a fun and rewarding experience for anyone with a green thumb. By following the steps outlined in this guide, you will be able to provide your yellow squash with the best care and environment for optimal growth.
Here are the key takeaways from this guide:
- Choose a pot with proper drainage and fill with a rich, well-draining soil mix.
- Plant yellow squash seeds in the pot, spacing them about 12-18 inches apart, and keep the soil moist but not waterlogged.
- Provide adequate sunlight, water, and fertilizer, and prune and train the plants as necessary to maintain their shape and health.
- Be on the lookout for common problems like pests, diseases, and poor production, and take steps to address these issues as they arise.
- Harvest the yellow squash when they are still small and tender, and store them in a cool, dry place for up to a week.
By following these tips, you will be well on your way to growing a successful and bountiful crop of yellow squash in your own home. So why not try it out today and enjoy the taste and satisfaction of homegrown vegetables?
HTML format output:
Conclusion:
Growing yellow squash in a pot at home can be a fun and rewarding experience for anyone with a green thumb. By following the steps outlined in this guide, you will be able to provide your yellow squash with the best care and environment for optimal growth.
Here are the key takeaways from this guide:
- Choose a pot with proper drainage and fill with a rich, well-draining soil mix.
- Plant yellow squash seeds in the pot, spacing them about 12-18 inches apart, and keep the soil moist but not waterlogged.
- Provide adequate sunlight, water, and fertilizer, and prune and train the plants as necessary to maintain their shape and health.
- Be on the lookout for common problems like pests, diseases, and poor production, and take steps to address these issues as they arise.
- Harvest the yellow squash when they are still small and tender, and store them in a cool, dry place for up to a week.
By following these tips, you will be well on your way to growing a successful and bountiful crop of yellow squash in your own home. So why not try it out today and enjoy the taste and satisfaction of homegrown vegetables?